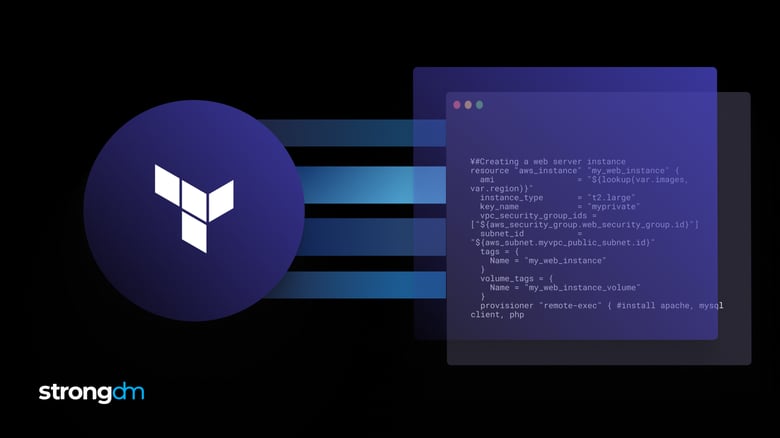
Terraform, we are a go for launch on the StrongDM provider! We are happy to announce that StrongDM has officially launched as a Terraform provider. That means that in one single configuration you can spin up a fleet of servers, import them into StrongDM, and provision your users access in a matter of minutes.
What is Terraform?
Terraform is an open source tool that aims to break down providers into code, making them simpler and easier to apply and provision, all while increasing automation. It essentially provides a single source of truth as you codify all of your infrastructure into code. And that’s exactly why we chose to integrate with it.
StrongDM + Terraform
StrongDM plays a critical role in the adoption of infrastructure-as-code by making access to that infrastructure ephemeral and automated. That means you can develop a repeatable process for infrastructure access that allows you to focus on the things that matter rather than having to continually manage something that can be automated. It’s basically applying the same principles that you’ve embraced for DevOps, such as CI/CD, to infrastructure and access.
When used in conjunction with Terraform, you can provision and deprovision infrastructure access the moment resources are deployed or taken offline.
Not to mention that by using StrongDM for end-to-end infrastructure access, your security team can feel confident that your infrastructure is secured, controlled, and auditable from the very beginning. 😉
Infrastructure Access as Code, Applied
Let’s go through a quick example of why this approach is so powerful. Think through your workflow to allow the teams to be given infrastructure access at the point of provisioning. For example, let’s say we wanted to provision a web server and a MySQL database. One team may need access to SSH to the web server and MySQL server, and the other may need access to the DB.
Deploying into AWS may look something like this:
#Creating a web server instance
resource "aws_instance"
"my_web_instance" {
ami = "${lookup(var.images, var.region)}"
instance_type = "t2.large"
key_name = "myprivate"
vpc_security_group_ids = ["${aws_security_group.web_security_group.id}"]
subnet_id = "${aws_subnet.myvpc_public_subnet.id}"
tags = {
Name = "my_web_instance"
}
volume_tags = {
Name = "my_web_instance_volume"
}
provisioner "remote-exec" {
#install apache, mysql client, php
inline = [
"sudo mkdir -p /var/www/html/",
"sudo yum update -y",
"sudo yum install -y httpd",
"sudo service httpd start",
"sudo usermod -a -G apache centos",
"sudo chown -R centos:apache /var/www",
"sudo yum install -y mysql php php-mysql",
]
}
provisioner "file" {
#copy the index file form local to remote
source = "d:\\terraform\\index.php"
destination = "/tmp/index.php"
}
provisioner "remote-exec" {
inline = [
"sudo mv /tmp/index.php /var/www/html/index.php"
]
}
connection {
type = "ssh"
user = "centos"
password = ""
host = self.public_ip
# copy < private.pem > to your local instance to the home directory
# chmod 600 id_rsa.pem
private_key = "${file("d: \\terraform\\ private\\ myprivate.pem ")}"
}
}
#Creating a MySQL RDS Instance
resource "aws_db_instance"
"my_database_instance" {
allocated_storage = 20
storage_type = "gp2"
engine = "mysql"
engine_version = "5.7"
instance_class = "db.t2.micro"
port = 3306
vpc_security_group_ids = ["${aws_security_group.db_security_group.id}"]
db_subnet_group_name = "${aws_db_subnet_group.my_database_subnet_group.name}"
name = "mydb"
identifier = "mysqldb"
username = "myuser"
password = "mypassword"
parameter_group_name = "default.mysql5.7"
skip_final_snapshot = true
tags = {
Name = "my_database_instance"
}
}
In this case, we could easily import those resources into StrongDM using the following:
#Adding mysql db into StrongDM
resource "sdm_resource"
"mysql" {
  mysql {
    name = "mysql_prod_db"
    hostname = aws_db_instance.my_database_instance.public_dns
    username = aws_db_instance.my_database_instance.username
    password = aws_db_instance.my_database_instance.password
    database = aws_db_instance.my_database_instance.name
    port = aws_db_instance.my_database_instance.port
  }
}
#Adding ssh resource into StrongDM
resource "sdm_resource"
"web_server" {
  ssh {
    name = "web_server"
    hostname = aws_instance.my_web_instance.public_dns
    username = aws_instance.my_web_instance.connection.user
    port = "22"
  }
}
#Pub Key for StrongDM
output "web_server_public_key" {
  value = sdm_resource.web_server.ssh[0].public_key
}
By adding these lines, we’ve imported the MySQL DB and SSH server. You can see that we can use Terraform outputs to import the information easily into StrongDM (FYI - for the SSH server, you’ll need to update the ~/.ssh/authorized_keys with the output given for the SSH connection to be fully set up). Finally, we can add additional lines to Terraform to create users and roles, then update those roles with permissions to those resources.
#Creating our users
resource "sdm_account"
"jane_doe" {
  user {
    first_name = "Jane"
    last_name = "Doe"
    email = "Jane.doe@yourcompany.com"
  }
}
resource "sdm_account"
"john_doe" {
  user {
    first_name = "John"
    last_name = "Doe"
    email = "John.doe@yourcompany.com"
  }
}
#Creating our roles
resource "sdm_role"
"sre_team" {
  name = "SRE Users"
}
resource "sdm_role"
"db_team" {
  name = "DB Users"
}
#Attaching our roles to users
resource "sdm_account_attachment"
"sre_jane_doe" {
  account_id = sdm_account.jane_doe.id
  role_id = sdm_role.sre_team.id
}
resource "sdm_account_attachment"
"db_john_doe" {
  account_id = sdm_account.john_doe.id
  role_id = sdm_role.db_team.id
}
#Granting access to those resources through roles
resource "sdm_role_grant"
"web_server" {
  role_id = sdm_role.sre_team.id
  resource_id = sdm_resource.web_server.ids[0]
}
resource "sdm_role_grant"
"mysql_prod_db" {
  role_id = sdm_role.db_team.id
  resource_id = sdm_resource.mysql_prod_db.ids[0]
}
This approach makes it easy to provision and deprovision access in a moment, rather than having to use a manual process. Reduce human error and increase efficiency and security? Talk about a win/win.
With Terraform, StrongDM can help you easily integrate into every provider in the workflows you’ve already established. That means you can:
- Quickly deploy StrongDM into your environment
- Import existing infrastructure easily into the StrongDM platform
- Dynamically provision user or roles and update their access in real time to new infrastructure
- Easily integrate StrongDM into existing workflows to make a repeatable programmatic process
- Use Terraform to configure StrongDM with Hashicorp Vault
Want to get Started?
To get started using the StrongDM Terraform provider, you can find the documentation here. If you’re using AWS, you can find a Quick Start Guide in AWS here. We’d love to see what interesting items you create with Terraform and StrongDM. And if you’d like to share with others, we also have a Github contribution page. Let us know what you think!
StrongDM Resources: