
Written by
StrongDM TeamLast updated on:
February 24, 2025Reading time:
Contents
Built for Security. Loved by Devs.
- Free Trial — No Credit Card Needed
- Full Access to All Features
- Trusted by the Fortune 100, early startups, and everyone in between
Setting permissions, revoking access, and performing other user management duties in Linux can improve your system's security and organization, ensuring users can access the resources they need when they need to.
The useradd command lets you create, modify, and check user accounts, helping you handle multi-user environments across various Linux distributions.
But how do you use it?
Our guide tells you everything you need to know about the useradd command in Linux, as well as some best practices for user management.
What Is the Useradd Command?
Put simply, useradd is a command for creating new user accounts in Linux and other Unix-related operating systems. It interacts with system files to configure user details so you can set up accounts more efficiently. These system files include:
- /etc/passwd
- /etc/shadow
- /etc/group
Useradd isn't the only user management command for Linux. For example, the adduser command generates prompts throughout the user creation process, making it a more user-friendly and interactive alternative to useradd.
That said, useradd is robust and script-friendly, making it a good choice if you want to automate administrative tasks. It lets you control the user creation process from start to finish.
Key Differences Between Useradd and Adduser
Here's a closer look at how the useradd and adduser commands differ:
- useradd: a low-level, non-interactive utility that requires flags to configure user details
- adduser: a higher-level script, often found in Debian-based distributions, that provides interactive prompts and a user-friendly interface
Basic Syntax of the Useradd Command
The general format of the useradd command is:
useradd [options] USERNAME
Here's a breakdown of this syntax:
- [options]: These are optional flags that let you customize how you create users on Linux. For example, you can use a flag to create a home directory, which is a personal directory that's assigned to each user. Other flags include creating shells and groups.
- USERNAME: This is the name of the user account you want to create. The Linux useradd command has a 32-character limit for usernames.
Step-by-Step Guide to Creating a User in Linux
Follow these instructions if you want to create new users in Linux using the useradd command.
1. Open a Terminal
Start by opening your command-line interface, or terminal, in Linux. The quickest way to do this is to use the following keyboard shortcut: Ctrl-Alt-T.
2. Check for Administrative Privileges
You'll need to have root or sudo privileges to create new users. Check whether you can run commands as the root user by typing the following into your terminal:
sudo -v
3. Create a User
If you have administrative privileges, it's time to create a new user. You can do this by typing the following command:
sudo useradd newuser
This simple form of the useradd command creates a user account but doesn't set a password or create a home directory just yet.
4. Set a Password for the New User
To assign a password to a new user, use this command:
sudo passwd newuser
You can then enter and confirm your password.
5. Verify the User Creation
Check whether you successfully created a new user account by typing:
cat /etc/passwd | grep newuser
Alternatively, you can type:
id newuser
This command displays the user ID, group ID, and group memberships associated with your newly created user.
Common Options and Flags With Useradd
You can customize how you create new users in Linux with the useradd command in various ways. Below are some of the flags you can use:
- -d [directory]: This flag lets you specify a custom home directory for the user. Here's how to use this flag in a command: sudo useradd -d /home/customdir newuser.
- -e [YYYY-MM-DD]: The "-e" flag sets an expiration date for the user account. For example, sudo useradd -e 2024-12-31 newuser.
- -G [group1,group2]: If you want to add the user to specified groups, use the "-G" flag. For example, sudo useradd -G sudo,developers newuser.
- -s [shell]: This flag determines the default log-in shell for the user. For example, sudo useradd -s /bin/bash newuser. A shell is a computer program that lets Linux users control their operating system.
- -m: With the "-m" flag, you can automatically create the user's home directory if it doesn't exist. For example, sudo useradd -m newuser.
- -c [comment]: You can add a comment, such as the user's full name or other descriptive information, to the user's account with the "-c" flag. For example, sudo useradd -c "John Doe" newuser.
Advanced User Creation Examples
The above flags might be enough to successfully create users in your Linux environment. However, you could use more advanced options to customize the user creation process even further.
Here are some examples:
- Creating a user with a custom home directory: sudo useradd -d /custom/home/directory newuser
- Creating a user and assigning it to specific groups: sudo useradd -G sudo,developers newuser
- Creating a user with an expiration date: sudo useradd -e 2024-12-31 newuser
- Creating a user with a specific shell: sudo useradd -s /bin/zsh newuser
How to Modify Users After Creation
So far, you've learned how to create new users in Linux. But what happens if you want to modify user details after creating accounts? The usermod command comes in handy here.
Here are some scenarios where you might want to use the usermod command:
- Changing a user shell: sudo usermod -s /bin/zsh newuser
- Changing a home directory: sudo usermod -d /new/home/directory newuser
- Adding a user to a new group: sudo usermod -aG groupname newuser
Checking and Managing Users
Below, you'll find some other useful commands that can help you check and manage users:
- Verify user creation: You can check whether a user exists by running cat /etc/passwd | grep newuser or idnewuser.
- View user information: If you need more detailed information about a user's UID, GID, and group memberships, enter the finger command in your terminal, followed by the username.
- List all users: You can list all users in your Linux environment by viewing the "/etc/passwd" file. To access this file, run cat /etc/passwd.
- Monitor user log-in activity: Use the last command to view all recent log-ins. Just type last newuser in your terminal.
Frequently Asked Questions
Which command adds a new user in Linux?
The command is useradd. This command is used to create new user accounts in Linux. For example, you can run:
sudo useradd newuser
This will add a new user named "newuser" to your system.
What's the difference between useradd and adduser?
Useradd is a low-level, non-interactive command, while adduser offers interactive prompts and a user-friendly interface. Both commands help you create users in Linux.
How do I set a password during user creation?
After creating a user with the useradd command, use the "passwd" command to assign a password to that user.
How do I list all users in Linux?
You can list all users by viewing the "/etc/passwd" file. View this file by typing cat /etc/passwd in your terminal.
Is using the useradd command difficult?
It depends on whether you've used other Linux commands before. If you're unfamiliar with the operating system's command-line interface, you might struggle at first. The instructions above will make this process much easier.
How else can I create and edit users on Linux?
If you don't want to use Linux's terminal, you can always download a graphical user interface (GUI) tool for user management. Various programs can help you create, modify, and check users in your Linux environment without requiring you to run scripts.
How to Simplify Linux User Management With StrongDM
While the useradd command lets you check and manage users, you'll need a robust security solution to truly safeguard your Linux environment. That's where StrongDM comes in. Our Zero Trust Privileged Access Management platform gives you 100% control over user permissions and access levels so you can ensure only the right people see your sensitive information.
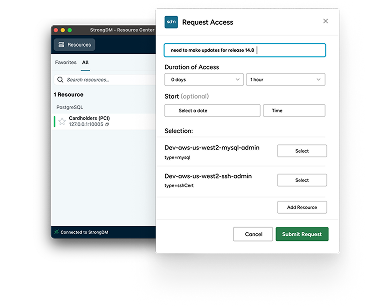
StrongDM centralizes and automates user access controls, making it easier to grant, modify, or revoke access to all of your systems and infrastructure, including Linux. As a result, you can maintain the least privilege necessary and ensure users have the correct permissions.
What's more, StrongDM reduces the chances of unauthorized access and improves your compliance with data governance frameworks and other security policies. Whether you're managing users on-premises or in the cloud, we can help.
Next Steps
StrongDM unifies access management across databases, servers, clusters, and more—for IT, security, and DevOps teams.
- Learn how StrongDM works
- Book a personalized demo
- Start your free StrongDM trial

Categories:

About the Author
StrongDM Team, Universal Privileged Access Authorization (UPAA), the StrongDM team is building and delivering a Zero Trust Privileged Access Management (PAM), which delivers unparalleled precision in dynamic privileged action control for any type of infrastructure. The frustration-free access stops unsanctioned actions while ensuring continuous compliance.
You May Also Like


