One of the most widely deployed software systems in the world, Kubernetes is a container-centric management system designed by Google and now maintained by a worldwide community of contributors.
Kubernetes is a popular tool for managing synchronized groups, or clusters, of computers. Users employ it to configure and deploy applications in parallel across clusters on your networks.
The kubectl command line tool in Kubernetes lets you send instructions to and receive information from your clusters. This kubectl cheat sheet is a quick guide to getting started with kubectl, including installation, configuration, key commands, and efficiency tips.
Getting Started With Kubectl
Installing kubectl and connecting to clusters is a fairly straightforward process.
Installing kubectl
You can install kubectl on different operating systems. Here are the leading options and their relevant install commands:
Chocolatey (Windows)
choco install kubernetes-cli
Homebrew (MacOS)
brew install kubectl
Ubuntu (Linux)
sudo apt-get update && sudo apt-get install -y kubectl
Verifying installation
You can verify the installation's success and check for the proper version with this command:
kubectl version
Working with individual clusters
First, check the configuration details of all the clusters Kubernetes has access to using the following command:
kubectl config view
This will help you verify that the cluster contexts, user credentials, and API server endpoints are set up correctly.
You can also display detailed information about the state of your current cluster:
kubectl cluster-info dump
To delete clusters:
kubectl config delete-cluster <cluster-name>
Contexts: Working with multiple clusters
When working with Kubernetes, you may have multiple clusters you want to manage independently. You can accomplish this with "contexts," which specify access parameters that define which cluster you are working with. This lets you switch between clusters to manage them independently.
To create a new context:
kubectl config set-context <context-name> --namespace=<namespace-name>
 --user=<user-name> --cluster=<cluster-name>
This command defines a context in terms of a name (title), namespace (similar to a folder), an administrator/owner, and a cluster.
To view the currently active context:
kubectl config current-context
To view all contexts:
kubectl config get-contexts
To switch to a different context:
kubectl config use-context <context-name>
To delete a context:
kubectl config delete-context <context-name>
Core Kubectl Commands
Next up in this Kubernetes cheat sheet, here are some of the very common commands you'll be using day in and day out when working with kubectl.
Basic command types
You can apply these commands to any type of Kubernetes resource, including deployments, pods, nodes, and services. In the following commands, `<resource>` is a placeholder for a resource name or type, such as `pod web-pod-18je`(a specific pod name) or `pods` (the type referring to all pods).
`get`
Use `get` to retrieve information about resources. It creates a table with key information about the specified resource.
kubectl get <resource>
`describe`
Use `describe` to retrieve a more detailed description of resources, including related resources like events involving those resources or controllers of those resources.
kubectl describe <resource>
`apply`
Use `apply` to apply a configuration to resources specified within the configuration file. In Kubectl, configurations are stored as YAML or JSON files, which specify resource kinds, names, and information about the desired resource state. If the specified resource does not yet exist, `apply` will create it.
kubectl apply -f <config-file-name>
`delete`
Use `delete` to delete specified resources.
kubectl delete <resource>
Using and editing configuration files
As stated, all resource configurations in kubectl are stored as YAML or JSON files and can be managed (viewed, described, applied, and deleted) using the above commands. The files themselves can be edited in any JSON or YAML editor. Kubectl includes an editing tool for these files, which can used with the following command:
kubectl edit -f <config-file-name>
Below is a sample YAML configuration file that defines a pod named 'nginx':
apiVersion: v1
 kind: Pod
 metadata:
   name: nginx
 spec:
   containers:
   - name: nginx
     image: nginx:1.14.2
     ports:
     - containerPort: 80
Working With Specific Kubernetes Objects
Object resources in Kubernetes include pods, nodes, services, deployments, configmaps, and secrets. Read on to learn the functionalities and commands for working with these objects.
Pod and node management
Pods and nodes contain computing resources, meaning that they are responsible for actually running applications on your network.
Pod management
Pods are collections of tiny computing resources known as "containers." Pods consist of one or more containers plus a specification of how to run those containers. All containers within a pod share storage and network resources, allowing the containers to run programs in parallel.
To create a pod, use the `apply` command on a configuration file defining that pod.
To list all pods in the current context:
kubectl get pods
To get detailed information about a specific pod:
kubectl describe pod <pod-name>
To delete a specific pod:
kubectl delete pod <pod-name>
To see metrics about the CPU and memory usage of all pods in the current context:
kubectl top pod
Node management
Nodes are collections of many (sometimes over 100) pods. Nodes correspond to an entire virtual or physical machine of computing resources.
To create a node, use the `apply` command on a configuration file defining that node.
To list all nodes in the current context:
kubectl get nodes
To get detailed information about a specific node:
kubectl describe node <node-name>
To delete a specific node:
kubectl delete node <node-name>
To see metrics about the CPU and memory usage of all nodes in the current context:
kubectl top node
Service and deployment management
Services and deployments are objects used to manage networking between computing resources and to balance the traffic load between these resources.
Service management
Services make applications available from a single endpoint, even when those applications run across disparate pods and nodes. Since services are objects within Kubernetes (just like pods and nodes are), working with them is similar to working with pods and nodes.
To create a service, use the `apply` command on a configuration file defining that service.
To list all services in the current context:
kubectl get services
To get detailed information about a specific service:
kubectl describe service <service-name>
To delete a specific service:
kubectl delete service <service-name>
Deployment management
Deployments coordinate the behavior of pods and nodes. The activation of a deployment is called a "rollout".
To create a deployment, use the `apply` command on a configuration file defining that service.
To list all deployments in the current context:
kubectl get deployments
To get detailed information about a specific deployment:
kubectl describe deployment <deployment-name>
To delete a specific deployment:
kubectl delete deployment <deployment-name>
To check the status of a deployment rollout:
kubectl rollout status <deployment-name>
To pause a deployment rollout:
kubectl rollout restart <deployment-name>
To resume a deployment rollout:
kubectl rollout resume <deployment-name>
To undo a deployment rollout:
kubectl rollout undo <deployment-name>
ConfigMap and secret management
Configmaps and secrets are objects that store configuration information that can be used by other objects.
Configmap management
Configmaps are unencrypted and should, therefore, be used to store only non-confidential information.
To create a configmap, use the `apply` command on a configuration file defining that configmap.
To list all configmaps in the current context:
kubectl get configmaps
To get detailed information about a specific configmap:
kubectl describe configmap <configmap-name>
To delete a specific configmap:
kubectl delete configap <configmap-name>
Secret management
Secrets are encrypted and should be used for storing sensitive information like passwords, keys, and tokens.
To create a secret, use the `apply` command on a configuration file defining that secret.
To list all secrets in the current context:
kubectl get secrets
To get detailed information about a specific configmap:
kubectl describe configmap <configmap-name>
To delete a specific configmap:
kubectl delete configap <configmap-name>
Advanced Kubectl Operations
Kubectl includes sophisticated functionalities for monitoring, debugging, and security.
Logs and monitoring
To monitor the performance of your clusters, you can print logs containing information about events within containers in these clusters with the command `kubectl logs`. The following are some options involving this command.
To return logs from all containers within a pod:
kubectl logs <pod-name> --all-containers=true
To return logs from a pod generated in the past hour:
kubectl logs --since=1h <pod-name>
To return logs related to a deployment run on a specific container:
kubectl logs <deployment-name> -c <container-name>
To return the 20 most recent log output lines from a pod:
kubectl logs --tail=20 <pod-name>
There are many other tools within kubectl for monitoring your clusters. As mentioned earlier, the command `kubectl top` can be used on pods and nodes to monitor their resource consumption. You can also monitor your node health with a node problem detector. To do this, create a JSON or YAML configuration file for a node problem detector (like this one) and then use the `apply` command on it.
Debugging commands
There are also many methods of debugging in kubectl, which vary based on the type of resource you need to debug. For details, see the pages Troubleshooting Applications and Troubleshooting Clusters in the official Kubernetes documentation.
At the most granular level, you can execute any command within a container using the following:
kubectl exec <pod-name> -c <container-name> -- <command>
 [command arguments]
Security and access permissions
If you need many team members interacting with kubectl, you'll want to take a more systematic approach to Kubernetes authentication, since not every user needs the ability to create, modify, and delete Kubernetes objects. One strong approach is role-based access control (RBAC), which limits unnecessary permissions in kubectl.
Efficiency Tips and Tricks
Make working with kubectl easier and more efficient by using these techniques.
Customizing output
You can include optional flags with commands that return information (like `get` and `describe`) to customize the format of the output. The following are some options.
- `-o=json`: Formats the output in JSON
- `-o=yaml`: Formats the output in YAML
- `-o=wide`: Formats the output in plaintext with additional information
- `-o custom-columns=<column-specification>`: Formats the output as a table with comma-separated columns defined in <column-specification>
- `-o=jsonpath=<jsonpath-template>`: Formats the output as a JSONPath template specified in <jsonpath-template>
Aliases and Bash completion
Instead of typing out "kubectl" every time you start a command, why not shorten it to "k"? Most shell programs allow you to set aliases — here's an example in Bash:
alias k='kubectl'
You can set aliases for any specific kubectl commands you find yourself using time and time again.
Kubernetes also provides an auto-completion tool within Bash to make working with kubectl faster. Here's an example of how to install this tool on MacOS using Homebrew:
brew install bash-completion@2
Labeling and annotation
All kubectl objects, including pods, nodes, and services, can be labeled and annotated for efficient filtering and review. The following are examples using pods.
To label a pod with a supplied key and value pair:
kubectl label pods <pod-name> <key=value>
To annotate a pod with a supplied key and value pair:
kubectl annotate pods <pod-name> <key=value>
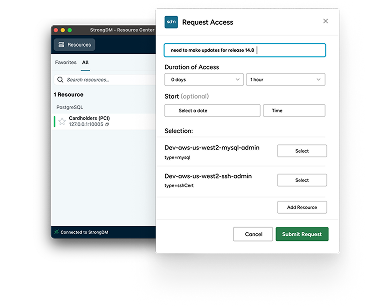
Simplify Kubernetes Management With StrongDM
StrongDM has security and management solutions to simplify your Kubernetes and kubectl workflows. Connect to Kubernetes and kubectl, connect your clusters, and manage Kubernetes Secrets, all within StrongDM's intuitive and secure UI. Book a demo to learn more about Zero Trust Privileged Access Management.
Additional Resources