
As AI agents take on actions once performed only by humans, traditional identity systems can’t provide clear delegation or accountability. StrongDM ID gives every agent a unique, verifiable identity linked to a human sponsor, ensuring organizations always know who authorized every action. In the next era of identity, authentication matters—but delegation defines trust.

Contents
Secure Access Made Simple
- Full Access to All Features
- Trusted by the Fortune 100, early startups, and everyone in between
Want to secure remote access to a private network? In this series of technical posts, we will share step-by-step instructions to create a Linux bastion host and create an audit trail by logging SSH commands.
The full tutorial is split into three parts:
Part 1: Creating your bastion hosts
- This post shows you how to create Linux virtual machines in Amazon Web Services, setup virtual networking, and create initial firewall rules to access the hosts.
Part 2: Managing SSH keys
- We will show you how to create an SSH key for your bastion host and look at ways you can streamline the bastion host login process without compromising the security of the key.
Part 3: Configuring hosts for logging
- How to configure our bastion hosts to gather verbose logging data and send it off site to a cloud service.
Part 1: Creating your bastion hosts
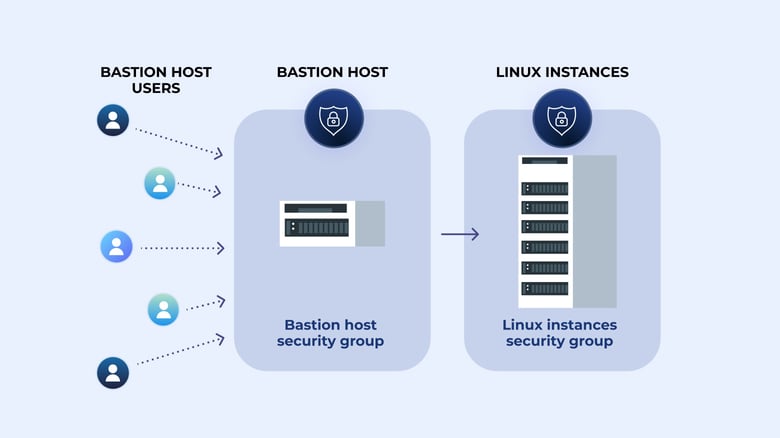
What is a bastion host?
A bastion host is a server used to manage access to an internal or private network from an external network - sometimes called a jump box or jump server. Because bastion hosts often sit on the Internet, they typically run a minimum amount of services in order to reduce their attack surface. They are also commonly used to proxy and log communications, such as SSH sessions.
Building an AWS bastion host
First, we will build a bastion host we can use to connect to other internal network hosts. We will use Amazon Web Services, as AWS cloud infrastructure as it’s relatively easy and cost-effective to spin up for demonstration purposes.
Head to the AWS Console and from there, under All Services, choose EC2. From there, click the blue Launch Instance button.
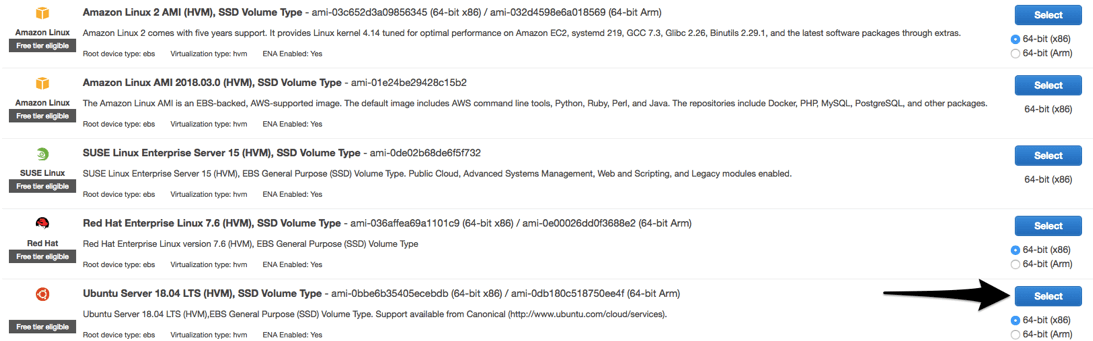
You will be offered a wide variety of Linux systems to choose from. Personally I’m most comfortable with Ubuntu Server 18, so I’ll choose it from the list:
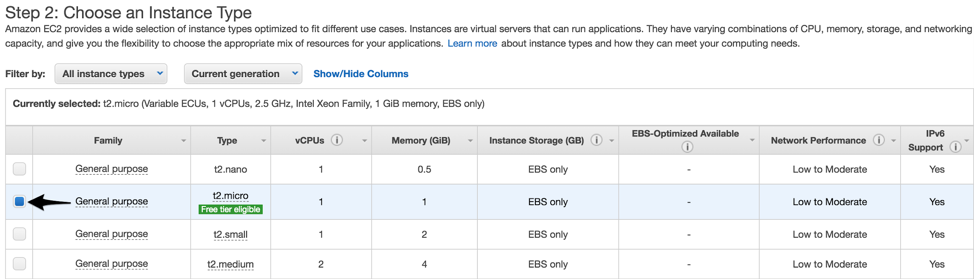
The next step asks you for an instance type. Our bastion host will really only be used to manage and log connections, so the Free tier eligible selection is fine:
Next, click Review and Launch at the bottom of the page.
One of the final step asks you to review the instance before launching it. Before we do that, click Edit security groups.
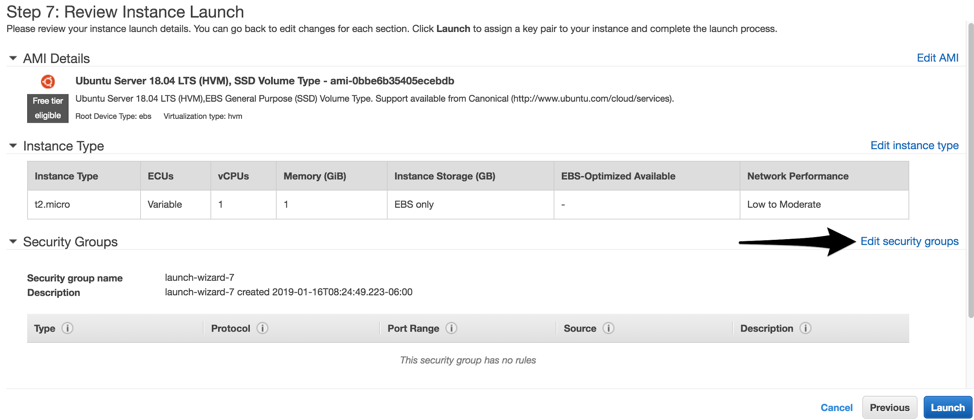
If we leave SSH wide open to the public Internet, it will be prone to brute-force attacks and exploit attempts. Choose to Create a new security group and give it an appropriate name like ssh-from-Internet, then create SSH rules that only allow connections for your team. You will likely want to allow your corporate office public IP addresses, as well as the IP addresses of staff members who often work from home (i.e. network and system administrators):
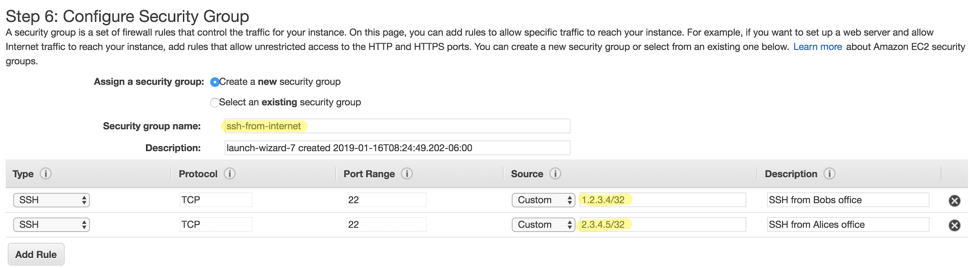
When all your teams IP addresses are added, click Review and Launch.
At the next screen, click Launch.
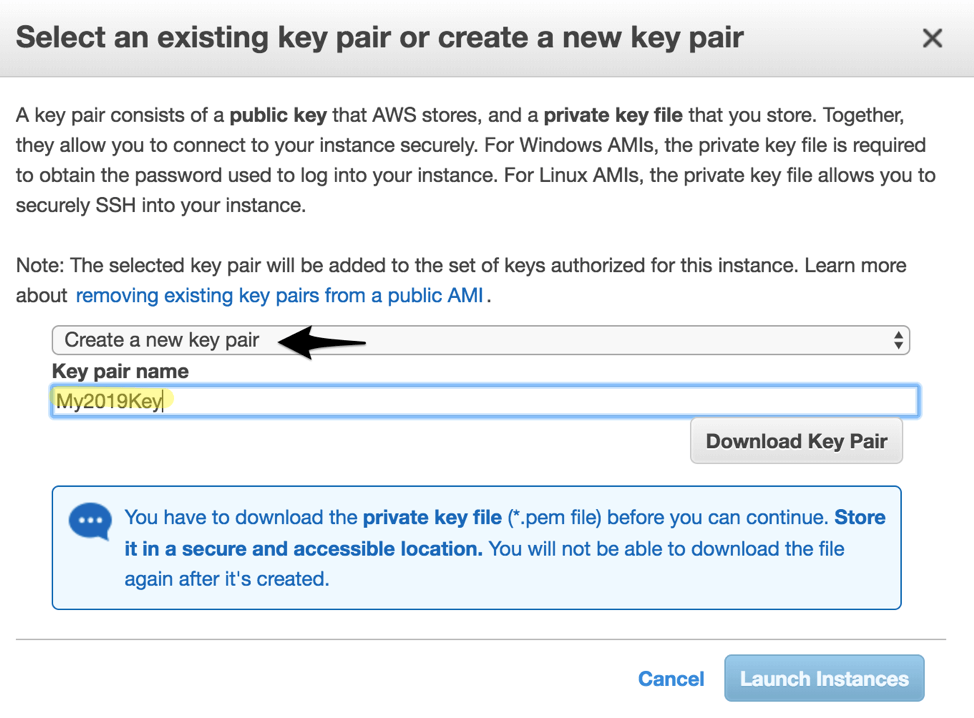
Finally, you’ll be asked to either create an existing SSH key pair to use with your new jump server, or use a pair you’ve previously established. For this example we will choose Create a new key pair, give it a Key pair name, and then click Download Key Pair before clicking Launch Instances.
You should then see a screen confirming that your host is launching:

Testing connectivity to the bastion server
Back at the AWS Console under EC2 → Instances you should now see your fresh bastion server running:

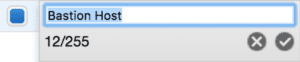
If you click into the white space under Name, you you will see a little pencil icon appear:

Click the pencil and then give your host a more appropriate name, and then click the checkmark icon:
From the buttons near the top of the screen, click Connect, and you will be shown a help window with instructions on using SSH to connect to your new bastion server:
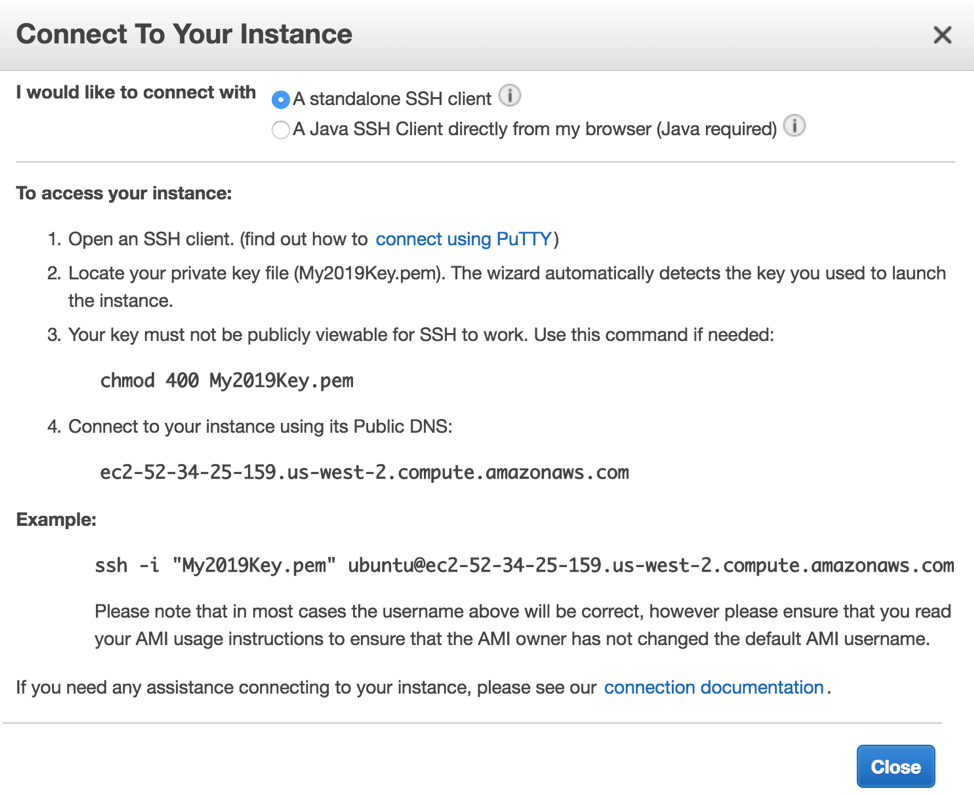
We’re using a Mac for this tutorial, so we are going to open the Terminal command line and go to the directory where our private key file - the one with .pem extension - lives (for more information about private and public keys, see this article), and then type the following:
chmod 400 My2019key.pem
Then, we will issue the following command to connect to the instance:
ssh -i "My2019Key.pem" ubuntu@ec2-52-34-25-159.us-west-2.compute.amazonaws.com You will replace ec2-52-34-25-159.us-west-2.compute.amazonaws.com with whatever the fully qualified domain name is of your host. If you’re asked to confirm the connection to the host, press y and Enter, and then you should complete the SSH connection successfully:
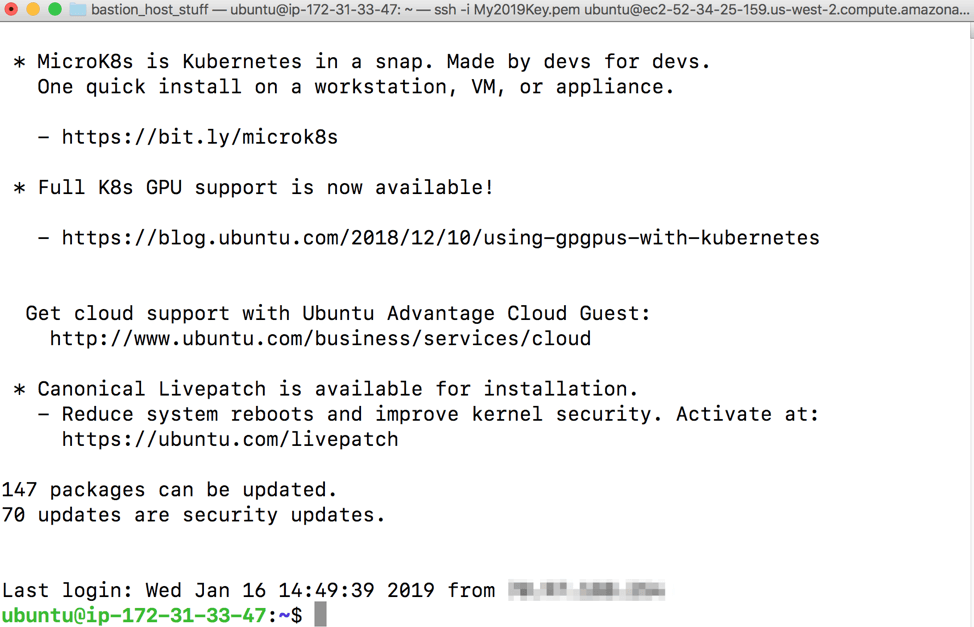
Note: you will by default login as the ubuntu user, but can switch to root access, if needed, using the sudo command.
Changing the bastion server name
You probably noticed that the hostname of the bastion server is shown as an IP address. We will configure a more friendly name by typing:
sudo nano /etc/hostname

Simply erase the current hostname and type in something that makes sense to you, like bastion-host. Press Control+x, then Y and Enter to save your changes. Next time you reboot, the new host name will take effect.
Creating an internal server to test with
Now that we have our public-facing bastion host configured and locked down to only allow SSH connections from IPs we know and trust, we will create a bastion guest for the bastion host to connect to.
Back at the AWS Console under EC2 → Instances you should now see both your bastion host called Bastion Host, as well as the brand new instance, which you can rename to something easier to remember like Bastion Guest.
While you’re in this view, click the Bastion Host and take note of it’s internal IP address, which we will need later. In this example, the IP of the host is 172.31.33.47, which resides on your private subnet in AWS

While you’re here, also take note of the internal IP of your Bastion Guest.
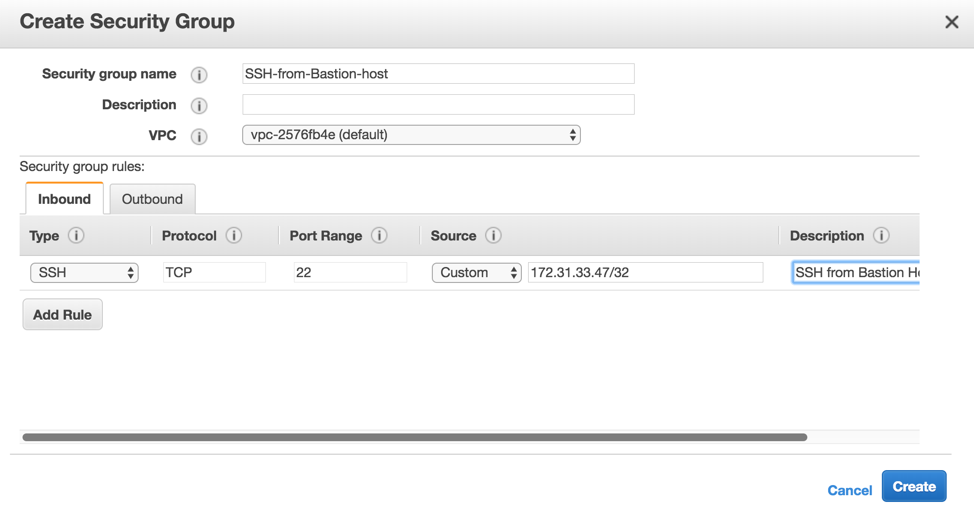
From the left-hand menu, click Security Groups, and then Create Security Group. Give it a name, such as SSH-from-Bastion-host, and then create an SSH rule to only allow the private IP of the Bastion host, which is notated as 172.31.33.47/32.
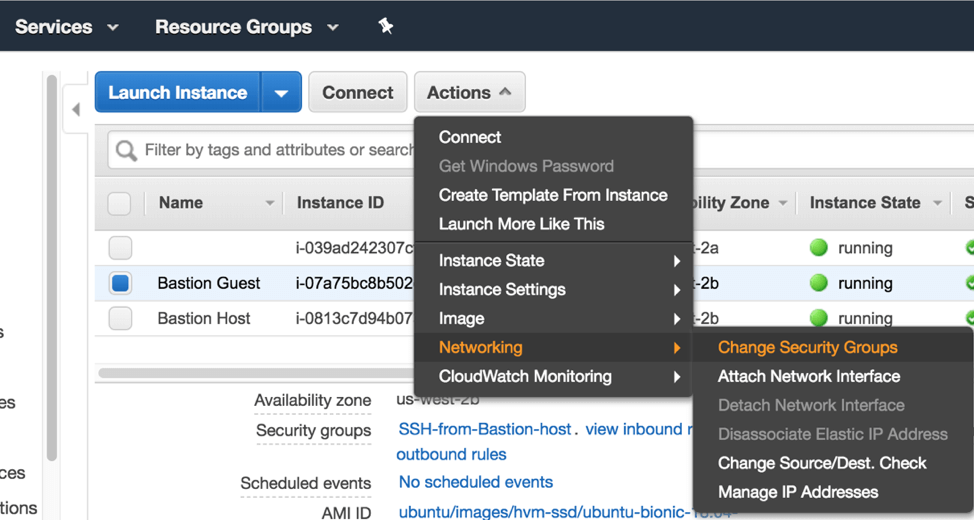
Back under the EC2 → Instances menu, click Bastion Guest, and then from the Actions menu click Networking → Change Security Groups.
From the window that appears, choose your new SSH-from-Bastion-host group and click Assign Security Groups:
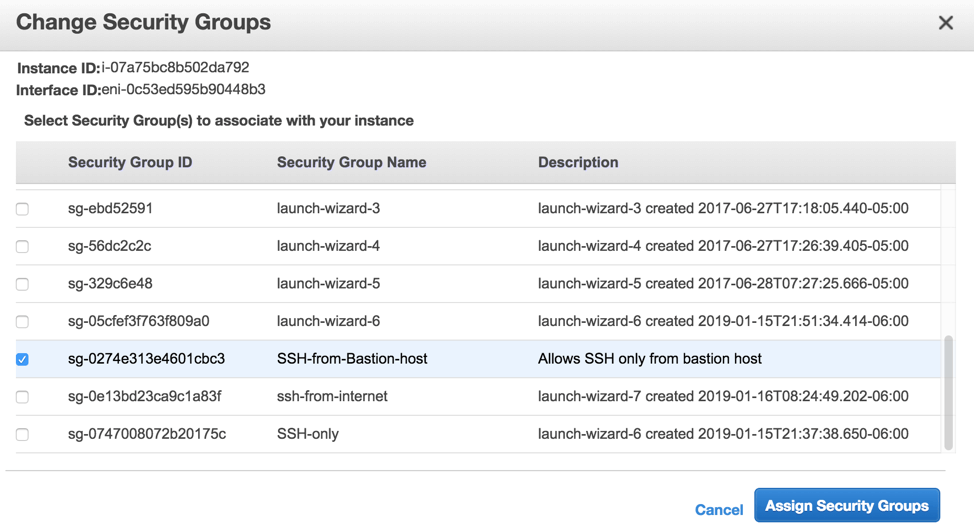
At this point, we’ve created our bastion host to allow SSH connections from public IP addresses we specify, and our bastion guest only allows SSH connections from the bastion host’s internal IP address.
In the next blog post of this series, we will look walk through the steps to secure access using ssh keys, including best practices for key management.
To learn more on how StrongDM helps companies with auditing, make sure to check out our Auditing Use Case.
Categories:
You May Also Like

As AI agents take on actions once performed only by humans, traditional identity systems can’t provide clear delegation or accountability. StrongDM ID gives every agent a unique, verifiable identity linked to a human sponsor, ensuring organizations always know who authorized every action. In the next era of identity, authentication matters—but delegation defines trust.

The modern cloud is fast, dynamic, and complex. But legacy security tools can’t keep up. As containers and ephemeral resources constantly change, and access requests surge, security teams are left scrambling. Entitlements pile up, visibility fades, and audits become a nightmare.

The modern cloud is fast, dynamic, and complex. But legacy security tools can’t keep up. As containers and ephemeral resources constantly change, and access requests surge, security teams are left scrambling. Entitlements pile up, visibility fades, and audits become a nightmare.
